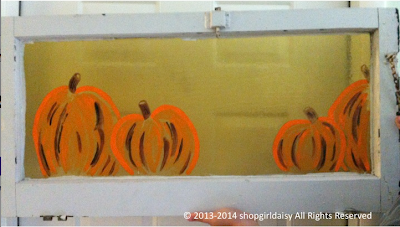
I love old vintage windowpanes. Who knows why! They are so cool and pretty. When the paint is peeling, I love them that much more! Last Thanksgiving when I hung my screen painted pumpkins window for fall, I decided that I wanted to try that same idea on glass.
And voilà....here is my beautiful DIY Fall window!
Here's how I did it...
1. Get an old window. You can find them on the curb, a rehab store, or a salvage yard. My parents visited me recently from the Orlando area and they said they saw a few on the side of the road and they questioned stopping to pick them up for me. Ummm...duh mom & dad!!!! Next time, please stop and GET THEM!!!! I say that with love. :)
2. Pick up some acrylic paint and paintbrushes. I purchased the paint, 3 for $1, at Michaels. I didn't realize until I got home that I ended up with a mix of outdoor acrylic paint, satin acrylic paint, and just plain acrylic paint. I didn't let that bother me. I just used them. I had the paintbrushes on hand so $0.
3. Draw how you want your pumpkins to be shown. I started by drawing out my pumpkins on graph paper so I could get an idea of what I wanted my window to look like. It also keeps you from making mistakes when it's time to paint.
4. Paint your pumpkins. I did not use a stencil. I hand drew my pumpkins and I'm by no means an artist! I started by painting the outlines of each pumpkin. Then, started layering in colors to create the streak-like look.
5. Find a font to create a stencil for the Fall letters. Blow them up to the size you want and print.
Unfortunately, I did not save the file so I cannot tell you what font I used or the size but here is my print out. The swirly line is my hand drawn stencil I used on each side of the letters. Take these stencils and tape them to the back of the window and use a fine tip paint brush to trace the letters and the swirly line. Let dry and begin painting in the lines. I had to paint 3-4 times to get the coverage I wanted.
And now to Mandy's Autumn Banner...Mandy's my sis. She's pretty cool! She and a friend got together to create these adorable banners. She surprised me by sending me one in the mail and while I only have two photos of my banner below, I'll still tell you how she made them. Super fun! Super cute!
1. Purchase burlap by the yard and acrylic paint (any colors you like). If you have large letter stamps, you can use those too.
2. To create the squares, create a template for size using cardboard or paper, and cut out your squares.
3. Use a large stencil or letter stamp. Mandy used a large stencil to sponge/paint the letters onto the burlap.
4. Fold a .5 inch of burlap to crease and create a pocket for the twine/hemp ribbon. And stitch it down using your sewing machine. (I've also seen some who use Wonder Under and iron two squares together to make banner stiff and keep it from fraying. Then they fold 1/2 inch over to create the pocket crease, insert twine ribbon, then dot hot glue at the corners to hold in place.)
5. Stitch the sides and bottom by sewing to keep ends from fraying. It also adds another touch of that vintage vibe.
6. Center stencil and sponge acrylic paint onto the burlap. Let dry.
And voilà....here is Mandy's awesome Autumn Banner! Thanks Mandy! I love it!! It's another one of my favorite fall decor pieces.
I hope Mandy & I inspired you to work on some DIY projects! Have fun!


Just wanted to say that, first of all, I'm WAY better than just "pretty cool"!!! Secondly, thanks to my great friend Mindy Irwin, the banner turned out SO good!!! I am not a sewer so it would never have happened if not for her. So happy you love it so much, Sis!!!
ReplyDelete